 Husbryg
 DIY Fermentation Temperature Control
As summer is approaching the temperature in the room I keep my fermentation buckets will likely rise to 22-23 °C or more if it gets really hot outside. During High Kräusen this could lead to the wort easily reaching 25 °C or higher which is not optimal for the majority of ale yeasts and could lead to undesired off flavours.
Since I ferment in “standard” 30 liter plastic buckets there are not many options available on the market. And those that exist are either quite expensive or have mixed reviews. I therefore decided to build my own cooler to help keep the fermenting wort within the optimal fermentation temperatures.
Ideally the cooler should satisfy the following goals:
- …be able to keep the wort at a steady temperature around 18-21 °C during primary fermentation.
- …have automatic temperature control without the need of regular adjustments.
- …be easily sanitized so the wort doesn’t get infected or otherwise contaminated.
- …not cost a fortune.
I had some thoughts about using some kind of immersion chiller coil, but that would require drilling holes in the bucked or lid and would probably also be difficult to sanitize properly especially around the seals or gaskets.
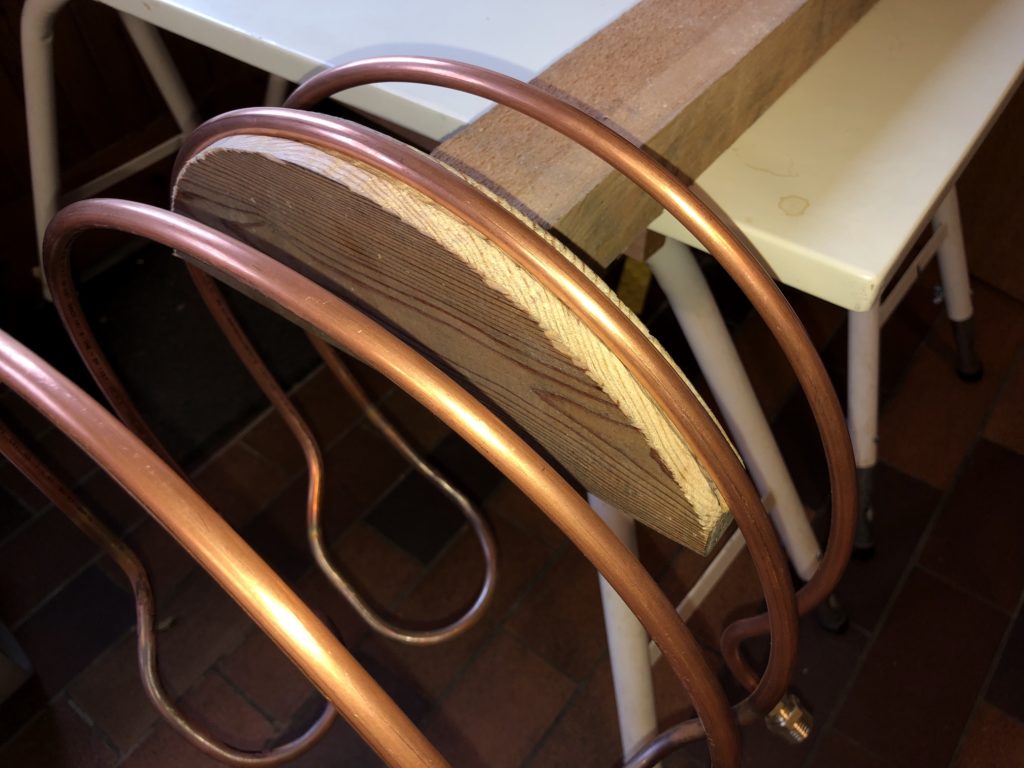
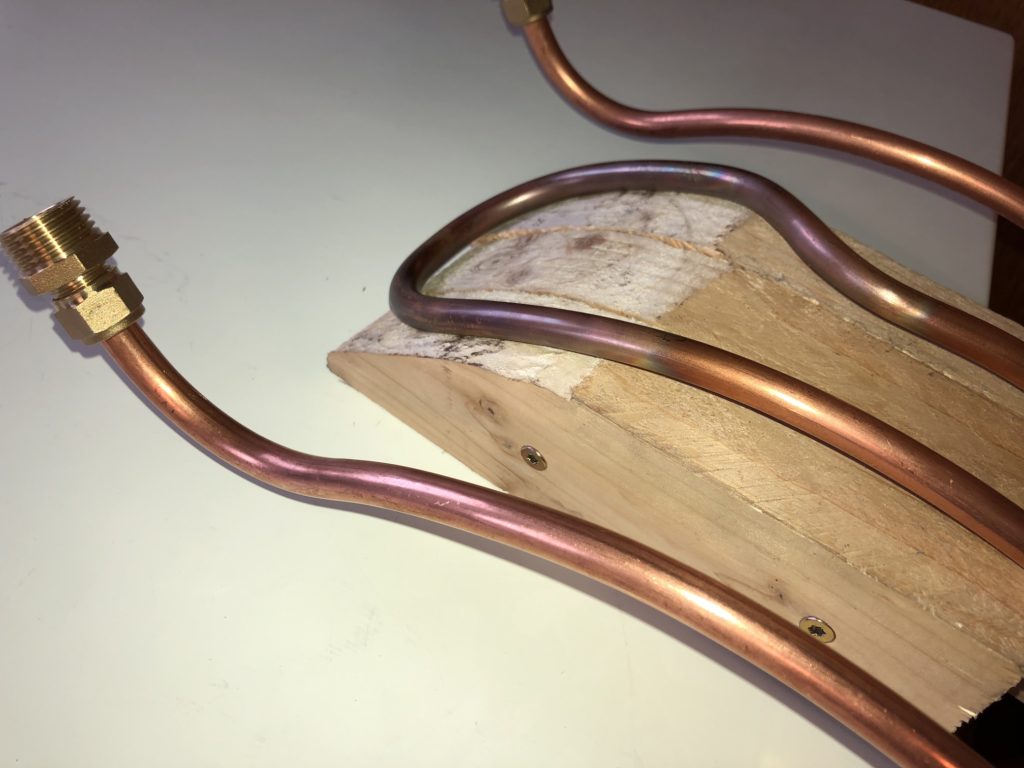
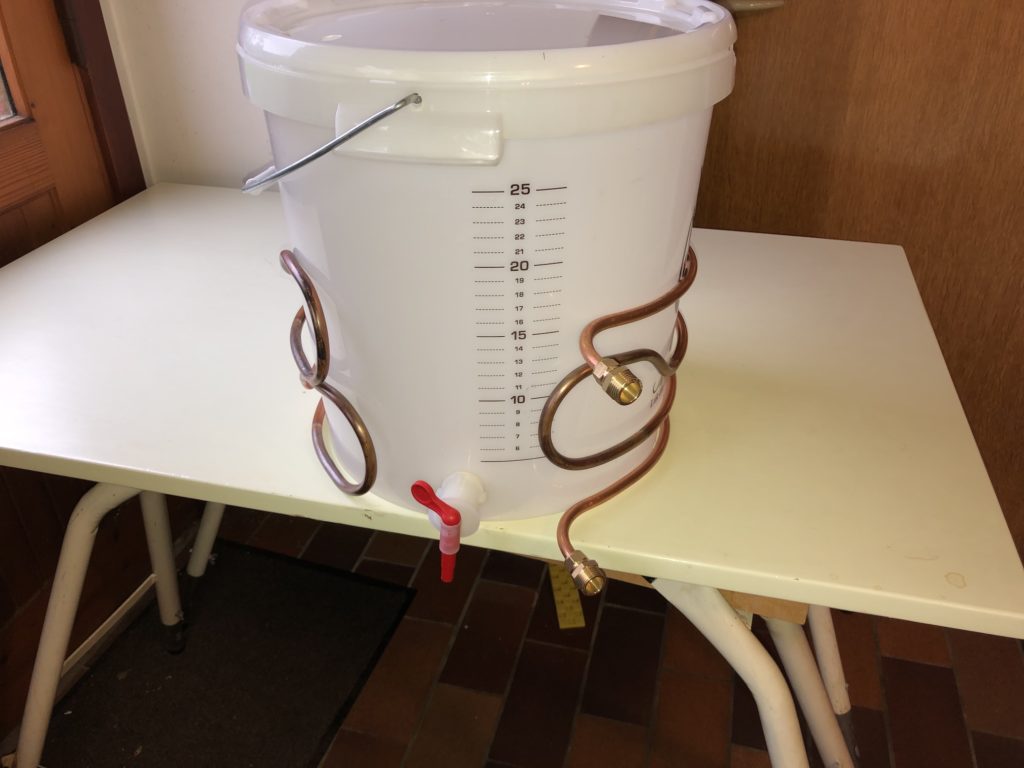
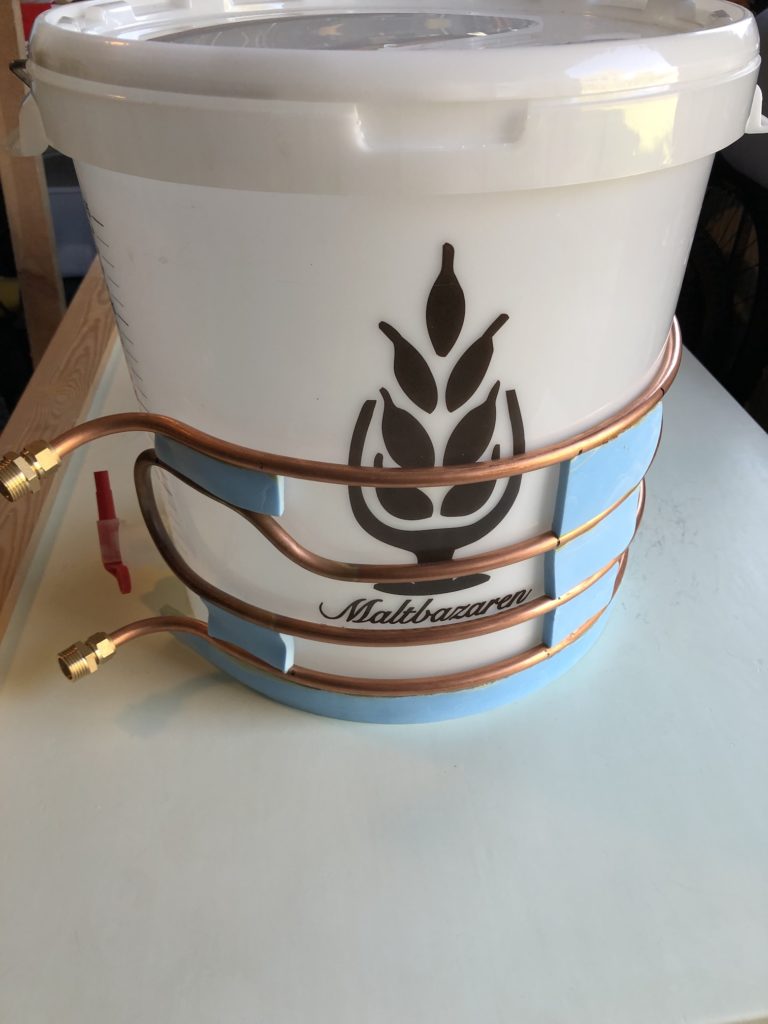
I eventually decided on making an external chiller coil using 4 meter of soft cupper pipe which would wrap around the outside of the fermentation bucket. It is not ideal in terms of transferring of energy through plastic since it provides some isolation. But at least there is no need of sanitization of the cupper pipes. Cupper in direct contact with the wort would also not have been good no matter how sanitary it could be made.
Instead of just wrapping a couple of loops of pipe around the bucket I decided on keeping a section free so that the bucket could just be lowered into the coil without the tap getting in the way.

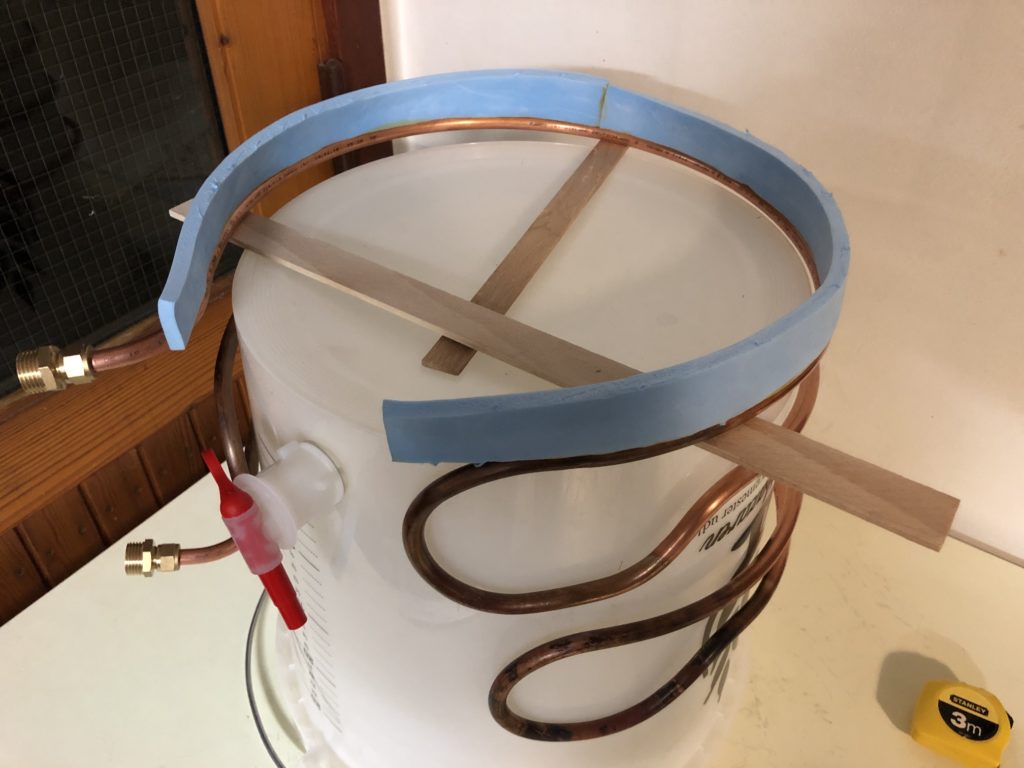
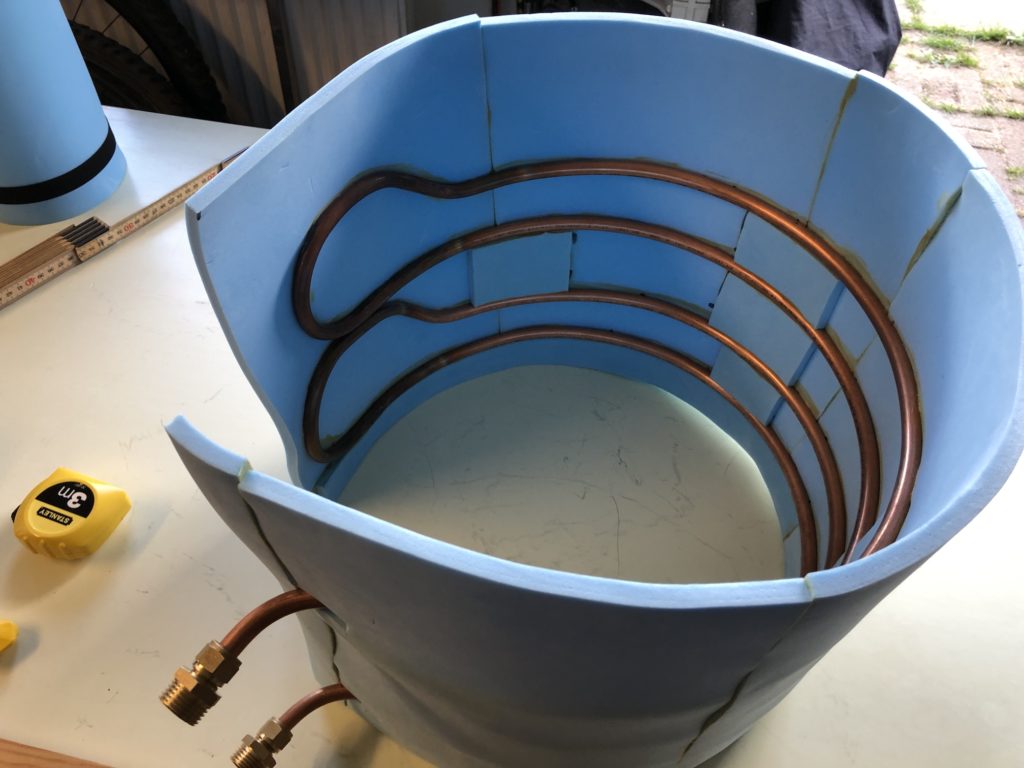
Once the cupper pipe had a good fit it was time to make the outer insulation. This would not only help keeping the cold inside and heat outside, but also stabilize the cupper pipes which are behaving a bit like a spring without proper support.
I used some cheap foam sleeping pads and glued these on in small pieces using contact adhesive. The initial layer was used mainly to keep the pipe in place and then additional two layers for the insulation. The remaining pieces were used for making a top and bottom layer too.
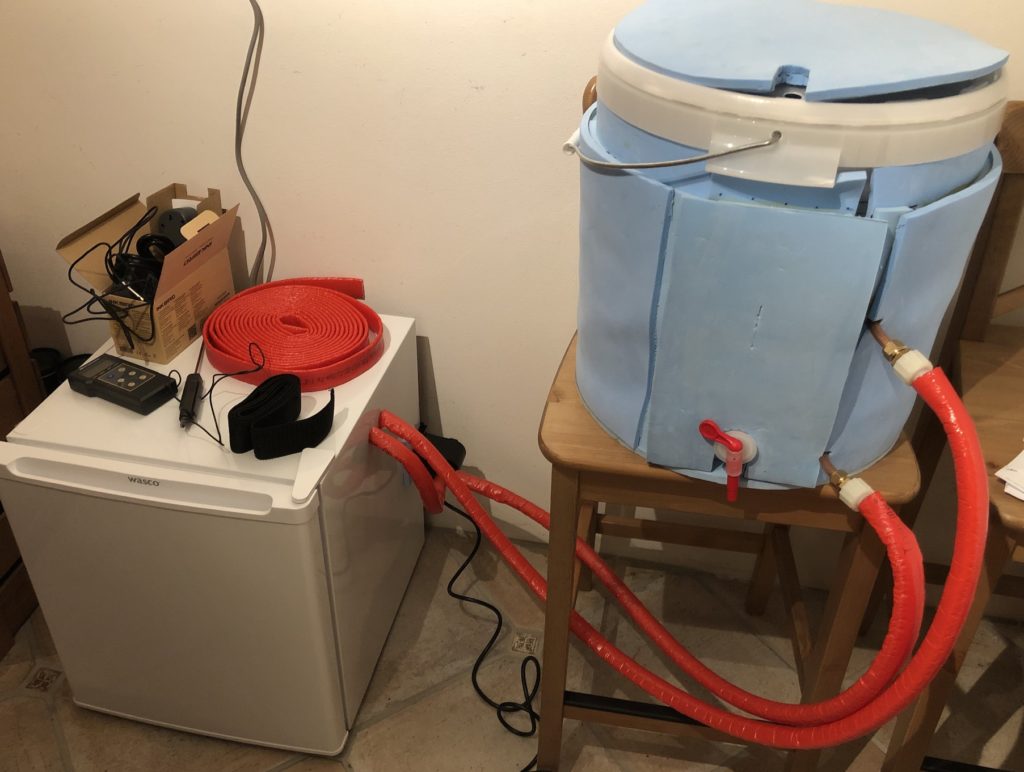
Finally, I got hold of a small refrigerator to keep the cooling water chilled. I couldn’t find any second hand so I had to buy a new one of a cheap’ish discount brand instead. The water will be kept in a bucket inside the refrigerator and pumped through the cupper coil using a water circulation pump for fish tanks. The temperature control is managed by an Inkbird ITC-308 which will turn on and off the pump as needed.
I’ll run a few tests of the setup and then plan on using it for the next brew of a dunkel weissbier in a few weeks. If you liked this post, or have any comments please feel free to comment below.