 Husbryg
 First Brew with Live Pressure Monitor
The first stable version of the Node-RED pressure monitor is now ready for testing out on a batch of beer.
I already have a TiltPi installation running and instead of using another Raspberry Pi setup for the pressure monitor, I want to run the pressure monitor in parallel to the Tilt monitor. This can fairly easy be done by adding another flow to the standard TiltPi flow.
Before installing the pressure flow, the default TiltPi installation need to be updated with these additional software components:
- i2c-bus
- node-red-contrib-i2c
Start by making a backup copy of the original tiltpi flow:
$ ssh pi@tiltpi
$ cd .node-red/
$ cp flows_tiltpi.json flows_tiltpi.json.backup-20200409
Install i2c-bus module
To install the i2c-bus module run the following command:
$ npm install i2c-bus
$ sudo raspi-config
In the raspi-config user interface navigate to Interfacing Options >> I2C and answer the question "Would you like the ARM I2C interface to be enabled?" with <Yes>.
Full details are available on https://github.com/fivdi/i2c-bus
Install node-red-contrib-i2c
The latest version of node-red-contrib-i2c is not yet available via npm so it need to be installed directly from the github repository. Unless git has already been installed on your Tilt Pi, you need to grab the git module too. Otherwise just skip the first two lines below:
$ sudo apt-get update
$ sudo apt install git
$ npm install --unsafe-perm https://github.com/nielsnl68/node-red-contrib-i2c.git
After restarting Node RED the new I2C modules are now ready for use.
Install the pressure monitor flow
Start by getting the latest version of the flow from clausbroch/node-red-pressure-monitor at GitHub.
In order to run the pressure monitoring flow on the TiltPi setup, simply import the pressure flow into a new tab in the existing Tilt flow. This can be done by selecting “Import” -> “Clipboard ” from the Node RED editor and then pasting the content of the flow.json file into the “import nodes” field. Make sure to select the option to import into a new flow.
Once you hit the “Deploy” button you should now have two new menu items in your Tilt Pi:
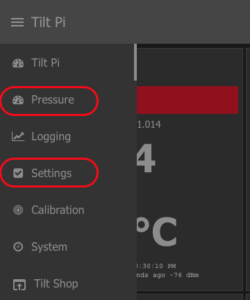
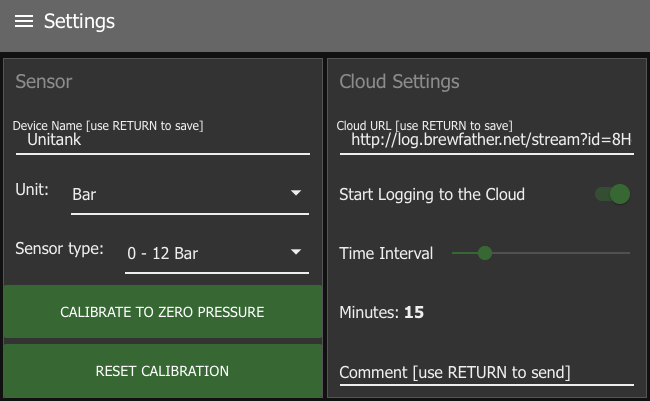
Open the Settings menu in the Tilt Pi and setup your pressure monitor. First set a name for the pressure monitor. You also need to set the pressure unit as well as the type of sensor that is attached to the ADC.
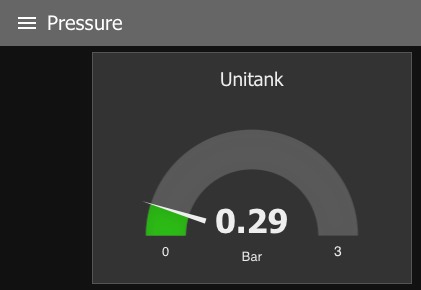
Hopefully there should now be live pressure readouts from the Pressure tab in Tilt Pi:
Integration with Brewfather
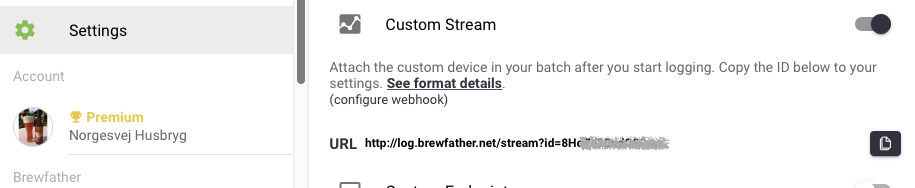
If you want to integrate the pressure monitor with Brewfather, you first need to open the Brewfather settings page and scroll to the “Custom Stream” setup. Enable the Custom Stream and copy your dedicated URL into the “Cloud URL” field above and then enable the “Start Logging to the Cloud” option.
Once you enable the logging in Tilt Pi you should see the pressure monitor as a new device under the Custom Stream types in the Brewfather device list.
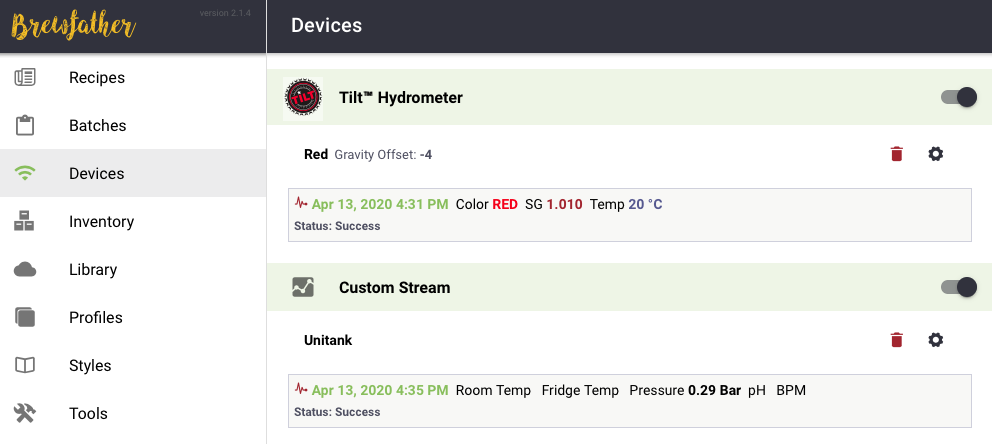
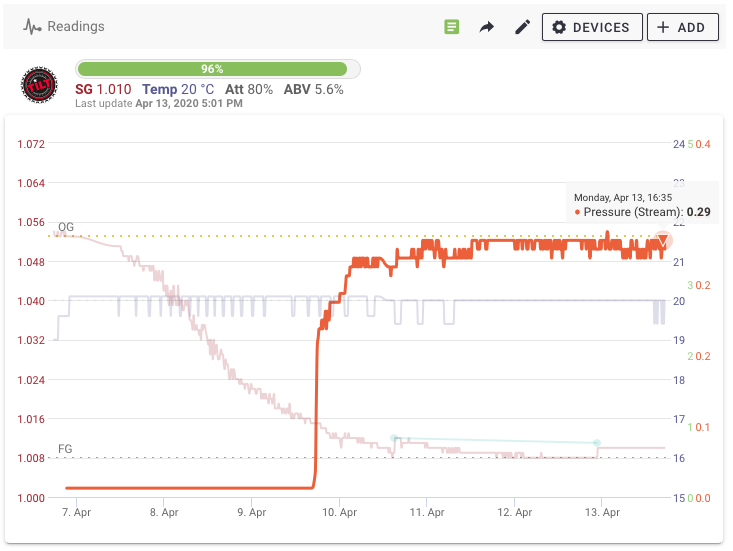
Finally, attach the pressure monitor custom stream to a fermenting batch in Brewfather via the “Devices” button, similar to how you would attach the Tilt. You should now see the graph of the pressure along with the other devices that are logging to that batch.
If you like this post or have any comments, please feel free to add them below.